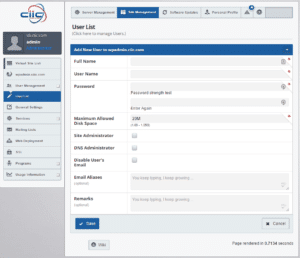
Go to the settings for the site you want to add a user to: (Click to enlarge image)

-
Full Name: Enter the full name of the user. Please enter any characters except colons. For example, John Doe is a valid entry.
-
User Name: Enter the name to be used by the system to identify the user. Please enter no more than 12 characters containing only lowercase alphanumeric characters, periods, hyphens and underscores. The first character must be a letter. For example, john.doe is a valid entry.
-
Password: Enter the password to be used by the system to identify this user. The password should be between 8 and 25 characters long. A good password should contain at least 5 characters with a mix of uppercase and lowercase letters as well as numbers and punctuation. It should not spell out any words found in the dictionary. Passwords are case sensitive. You may not use @ or _ within passwords.
-
Maximum Allowed Disk Space: Set the disk quota of this user. This is the maximum disk space available to this user for the storage of Web pages, email messages and all other user files. The quota can not be smaller than 1 MB. The default value for new users is set in the User Template. For site level accounts, you cannot leave the Maximum Allowed Disk Space (MB) field blank. You must enter a number in this field.
-
Site Administrator: Site administrators are users who are capable of configuring settings for a site, adding and removing users, and so on.
-
Email Aliases (optional): Enter additional names under which the user will receive email. Enter characters containing only lowercase alphanumeric characters, periods, hyphens and underscores. The default value is the lowercase first and last name of the user separated by a period. For example, john is a valid entry.
-
Remarks (optional): Enter additional information or comments about the user here.
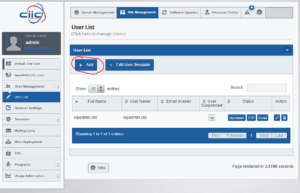
After a user has been added, the new user is listed in the User List screen.

