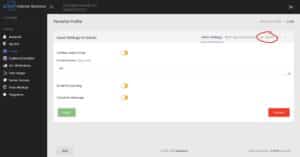
To SPAM filter settings use the following steps. Screenshots are at the bottom.
Information You Will Need
- Server Control Panel Address (usually https://mail.yourdomain.com/login)
- Email Username
- Email Password
- (contact support if you do not have this information)
Login with your username and password. Submit a Support Ticket if you need any help with your username or password.
- Login with your email username and password.
- Click on Email on the left side menu. (See screenshot step 2 below)
- Then click on the AV_SPAM item on the top right. (See screenshot step 3 below)
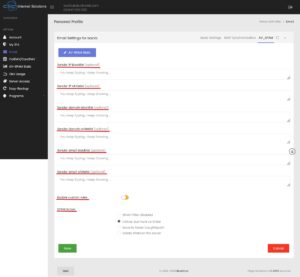
You have several options at this screen:
- SPAM Subject Identifier: Leave set to default of ***SPAM(_SCORE_)***
(This will be added to the front of the subject line on suspect SPAM emails that are delivered to you) - Required Score: The number of hits (score mentioned before) required before a mail is considered spam. Recommended value is 4 or 5. The lower this number the more aggressive the SPAM filter. Lower this number slowly to block more SPAM. Raise it to allow more email though without being blocked or tagged.
- Sender IP-blacklist: Block email by sender IP Address. One per line. Must be in CIDR format so a single address would have /32 at the end such as 192.168.0.254/32.
- Sender IP-whitelist: Allow email by sender IP Address. One per line. Must be in CIDR format so a single address would have /32 at the end such as 192.168.0.254/32.
- Sender domain blacklist: Used to specify domains which send mail that is often (incorrectly) not detected as spam, but which the user does not want. One entry per line. This entry should be JUST domains not a full email address. Those go below.
- Sender domain whitelist: Used to specify domains which send mail that is often tagged (incorrectly) as spam. One entry per line. Do not whitelist large email services such as gmail.com or outlook.com. You will allow in a ton of SPAM.
- Sender email blacklist: Used to specify domains which send mail that is often (incorrectly) not detected as spam, but which the user does not want. One entry per line. One entry per line. You may use wildcards (*) to add a whole domain, so *@somewhere.com will add the entire domain.
- Sender email whitelist: Used to specify addresses which send mail that is often tagged (incorrectly) as spam. One entry per line. You may use wildcards (*) to add a whole domain, so *@somewhere.com will whitelist the entire domain. Do not whitelist large email services such as gmail.com or outlook.com with a wildcard. You will allow in a ton of SPAM.
- Enable Custom Rules: This is a very advanced setting that allow users to create their own custom rules for the rspamd service. Most users will not have the knowledge to create custom rules.
- SPAM Action: The default is to deliver all email but mark suspected SPAM with the identifier from the first option. You can also choose to disable SPAM filtering, Move all suspected SPAM to a separate IMAP folder called ‘caughtspam’, or to simply delete all suspected SPAM. (Please be very careful using the option to delete as you cannot recover deleted messages)
- Click Save to finish.
If you need an address or domain white/blacklisted for all your users, the site administrator can enter these in the site admin area rather than having to do it manually for each user.
Once you have completed these settings you should create filters in your mail program to move the detected SPAM into a Junk Mail folder. You can find instructions here.